How to setup and launch a Calendar Push Notifications Campaign
Learning about the new ad format which is rocking the performance advertising world lately? If you are unfamiliar with the ad format, read more about Calendar Push Notification Ads and what they mean for your campaign goals here.
If you’re all caught up with what Calendar Push is, read below on how you can have a campaign live today with EZmob DSP.
Step 1: Register an account
If you haven’t already make sure your register an advertiser account, you can do so here. After you’ve registered you will need to verify your email address and login into the platform.
Step 2: Create a Calendar Push Notifications Campaign
Here are the steps to create a Calendar Push Campaign
Click the Campaigns tab on the top, and Choose ‘Push Campaign’
Input the details for your Calendar Push Campaign, in the name start with the text ‘CalPush’.
Add your creative for the campaign, although you’re given fields to input Description and Main Images, these are not necessary for Calendar Push Campaigns and are not communicated to the user. Also, please upload a static image to be able to save the campaign.
What do Calendar Push Ads look like?
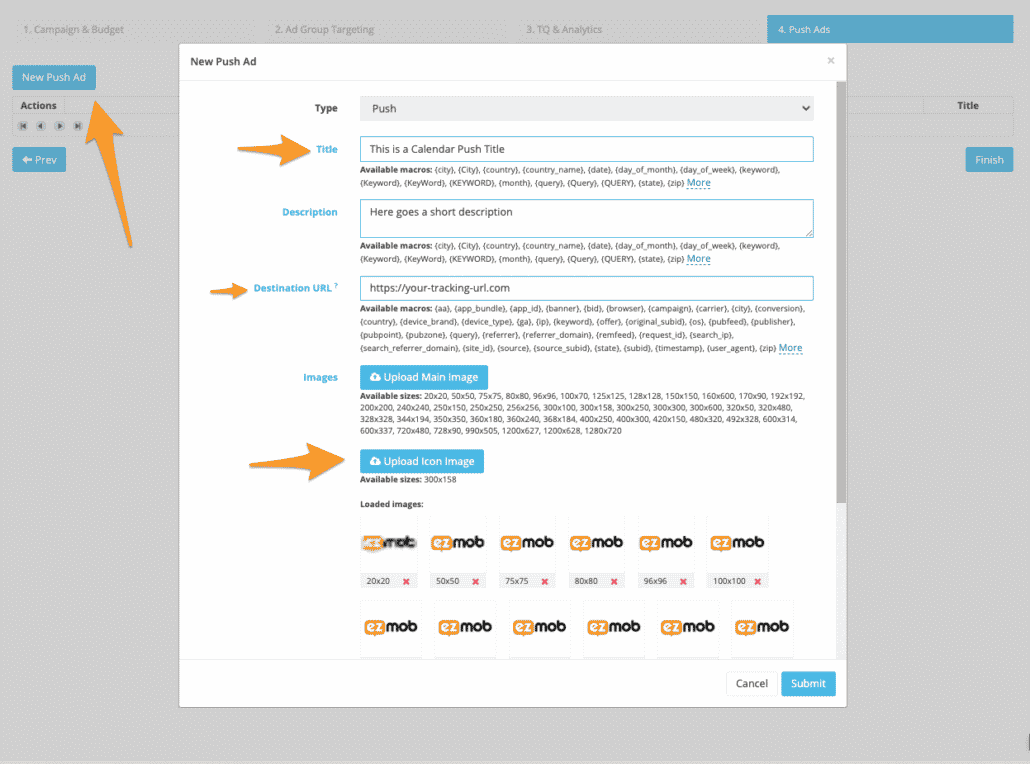
Also, similar to simpler android push notification ad formats, not including the image element of the ad, Calendar push ads are similar in nature, taking in 1 description line and a URL. Here’s what a user will see across his device.
What inventory is available for Calendar Based Advertising?
Inventory for Calendar Push ads are restricted for iOS and are available worldwide. Contact us to get the expected volume for your exact targeting. If you’ve already launched a campaign and not filling your daily caps, please use our helpdesk service and our support team will investigate.
Join our newsletter
Register an account