Why monetize your website with banner ad network tag or 'scripts'?
Brands often boost their product’s user base and acquire new users by media buying through programmatic banner ad networks which provides them with adequate transparency and the ability to scale their banner campaigns to the limit of what the ad exchange or publisher has to offer.
This type of media buy involves thousands of different placements or ad zones in even small-scale banner ad campaigns.
The estimated return per view or eCPM globally is usually pretty high and in this article, we’ll review how you can start monetizing your website with banner ad tags.
Table of Contents
What are banner ad network scripts?
Banner ad network tags, or scripts, are ad codes provided by the SSP or publisher ad network and integrated directly on a publisher’s website. Each user that browsers the website triggers an ad request that seeks the highest paying advertiser bid for fill.
Simple static images and animations to videos and interactive web applications and widgets are all examples of display ads and display marketing. However, one thing remains constant: when a viewer clicks on them, they take them to a company’s website or a specific landing page.
There are many advantages to media buying to banner advertising read more about it here.
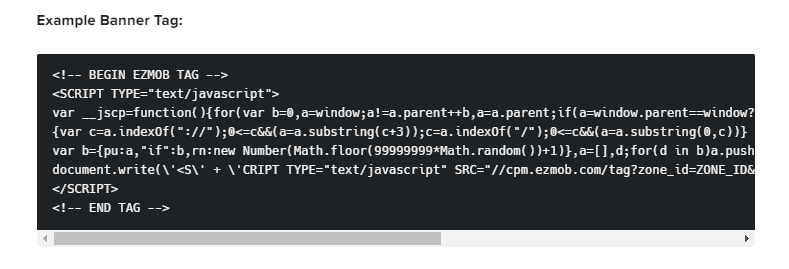
An example tag can be seen below:
How do you start monetizing banner ad network scripts?
Firstly you need a publisher account, any ad network that you believe has coverage where you plan to generate traffic from will do. You can register a publisher account with EZmob SSP. Simply click here and register a publisher account.
Once you’ve verified your publisher account, log in and click on add website.
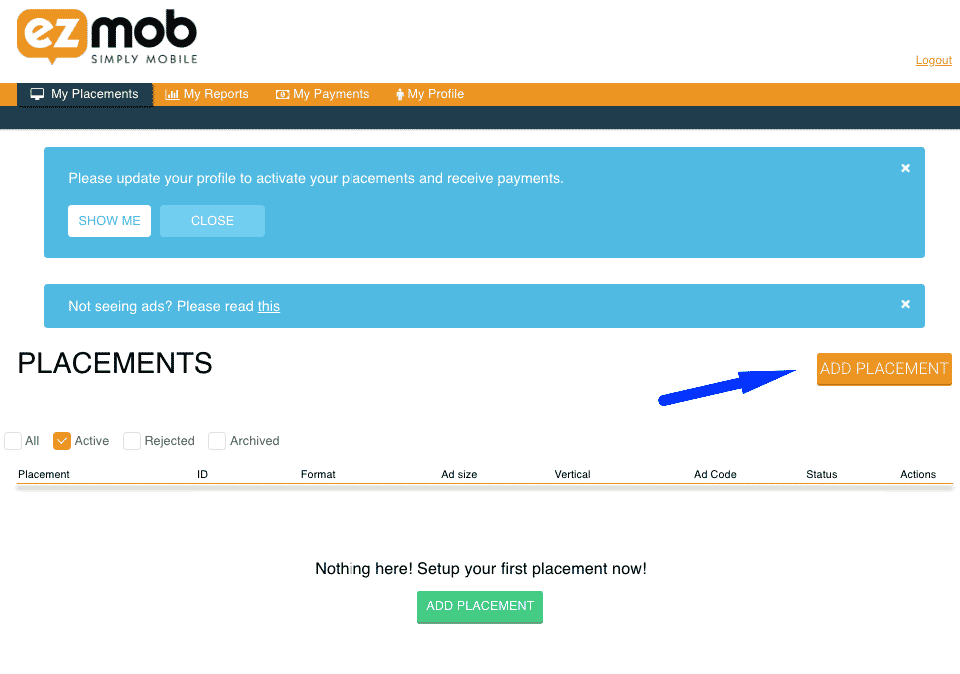
The next step would be to input your website details and get an ad network script for banner placement.
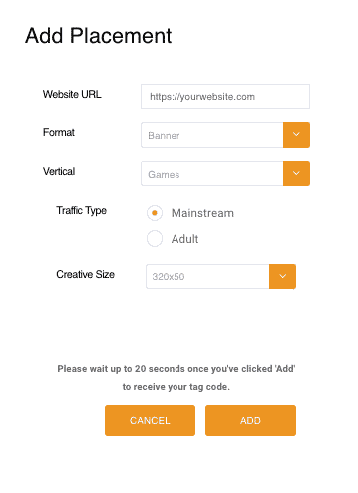
Enter the website URL and the ad format you’d like to generate. Pick between banner ad codes, popunder codes, and redirect links to monetize your inventory. For this case study, we’ll use banner codes.
Choose the relevant vertical, it’s important to select a relevant vertical as the ad server will use this data to match campaigns with your inventory, and the more relevant it is, the more demand will build up for your inventory.
Once you’ve selected a vertical, choose whether your inventory contains mainstream or adult traffic, this too is important, since some advertisers would prefer not to receive adult inventory, and receiving adult inventory from mainstream tags will be the reason for deduction or refusing your traffic.
The last step is choosing the banner ad unit script dimensions or the banner size. It’s important to stay with the popular sizes that are both adapted for mobile and desktop traffic. Those sizes are usually
- 728×90: great for desktop and tablets, less for mobile
- 300×250: works well on any platform
- 468×60: same as 728×90, doesn’t really support mobile
- 320×50: supports only mobile
- interstitial sizes, or full-page ads, that are adapted to only mobile sizes.
How to integrate banner ad network scripts on your website?
Simply copy the code from EZmob’s interface and copy it to relevant positions on your website.
If your website is WordPress it’s advised to use one of many free plugins that are suitable for serving banner ad codes and allow you to rotate banners instead of copy-pasting raw code everywhere on your website.
How do I know that the banner ad code was integrated well?
Simply load the page where the code was pasted, in most cases, you should see add fill the banner ad placement within about 10 minutes after it’s been generated from EZmob’s publisher interface and received its first ad request. If you don’t see any live banners within your banner position then try from a different device, use a VPN service, or use a different platform such as mobile to check the website. There might not be a relevant ad for your device and location at the time you’re checking so keep that in mind.
Regardless, ping one of our account managers on chat or email to help you validate your banner tag integration.
What sort of revenue can you generate with banner ad network scripts?
Publisher banner ad reporting and how to use it to your advantage?
Publisher payments and how to withdraw your commission
Once a month your reporting will be aggregated into a monthly publisher bill and confirmed by the ad network staff.
Banner ad network arbitrage
The bottom line
EZmob provides both advertisers and publishers with the best monetization and promotion techniques available with onclick popunder and push notification marketing and banner ad tag monetization. Join us today as a publisher and start earning more on your existing traffic and earn more money with pop ads.
Read more reviews and articles
Learn how to setup popunder campaigns and more about campaign management on EZmob’s Helpdesk
